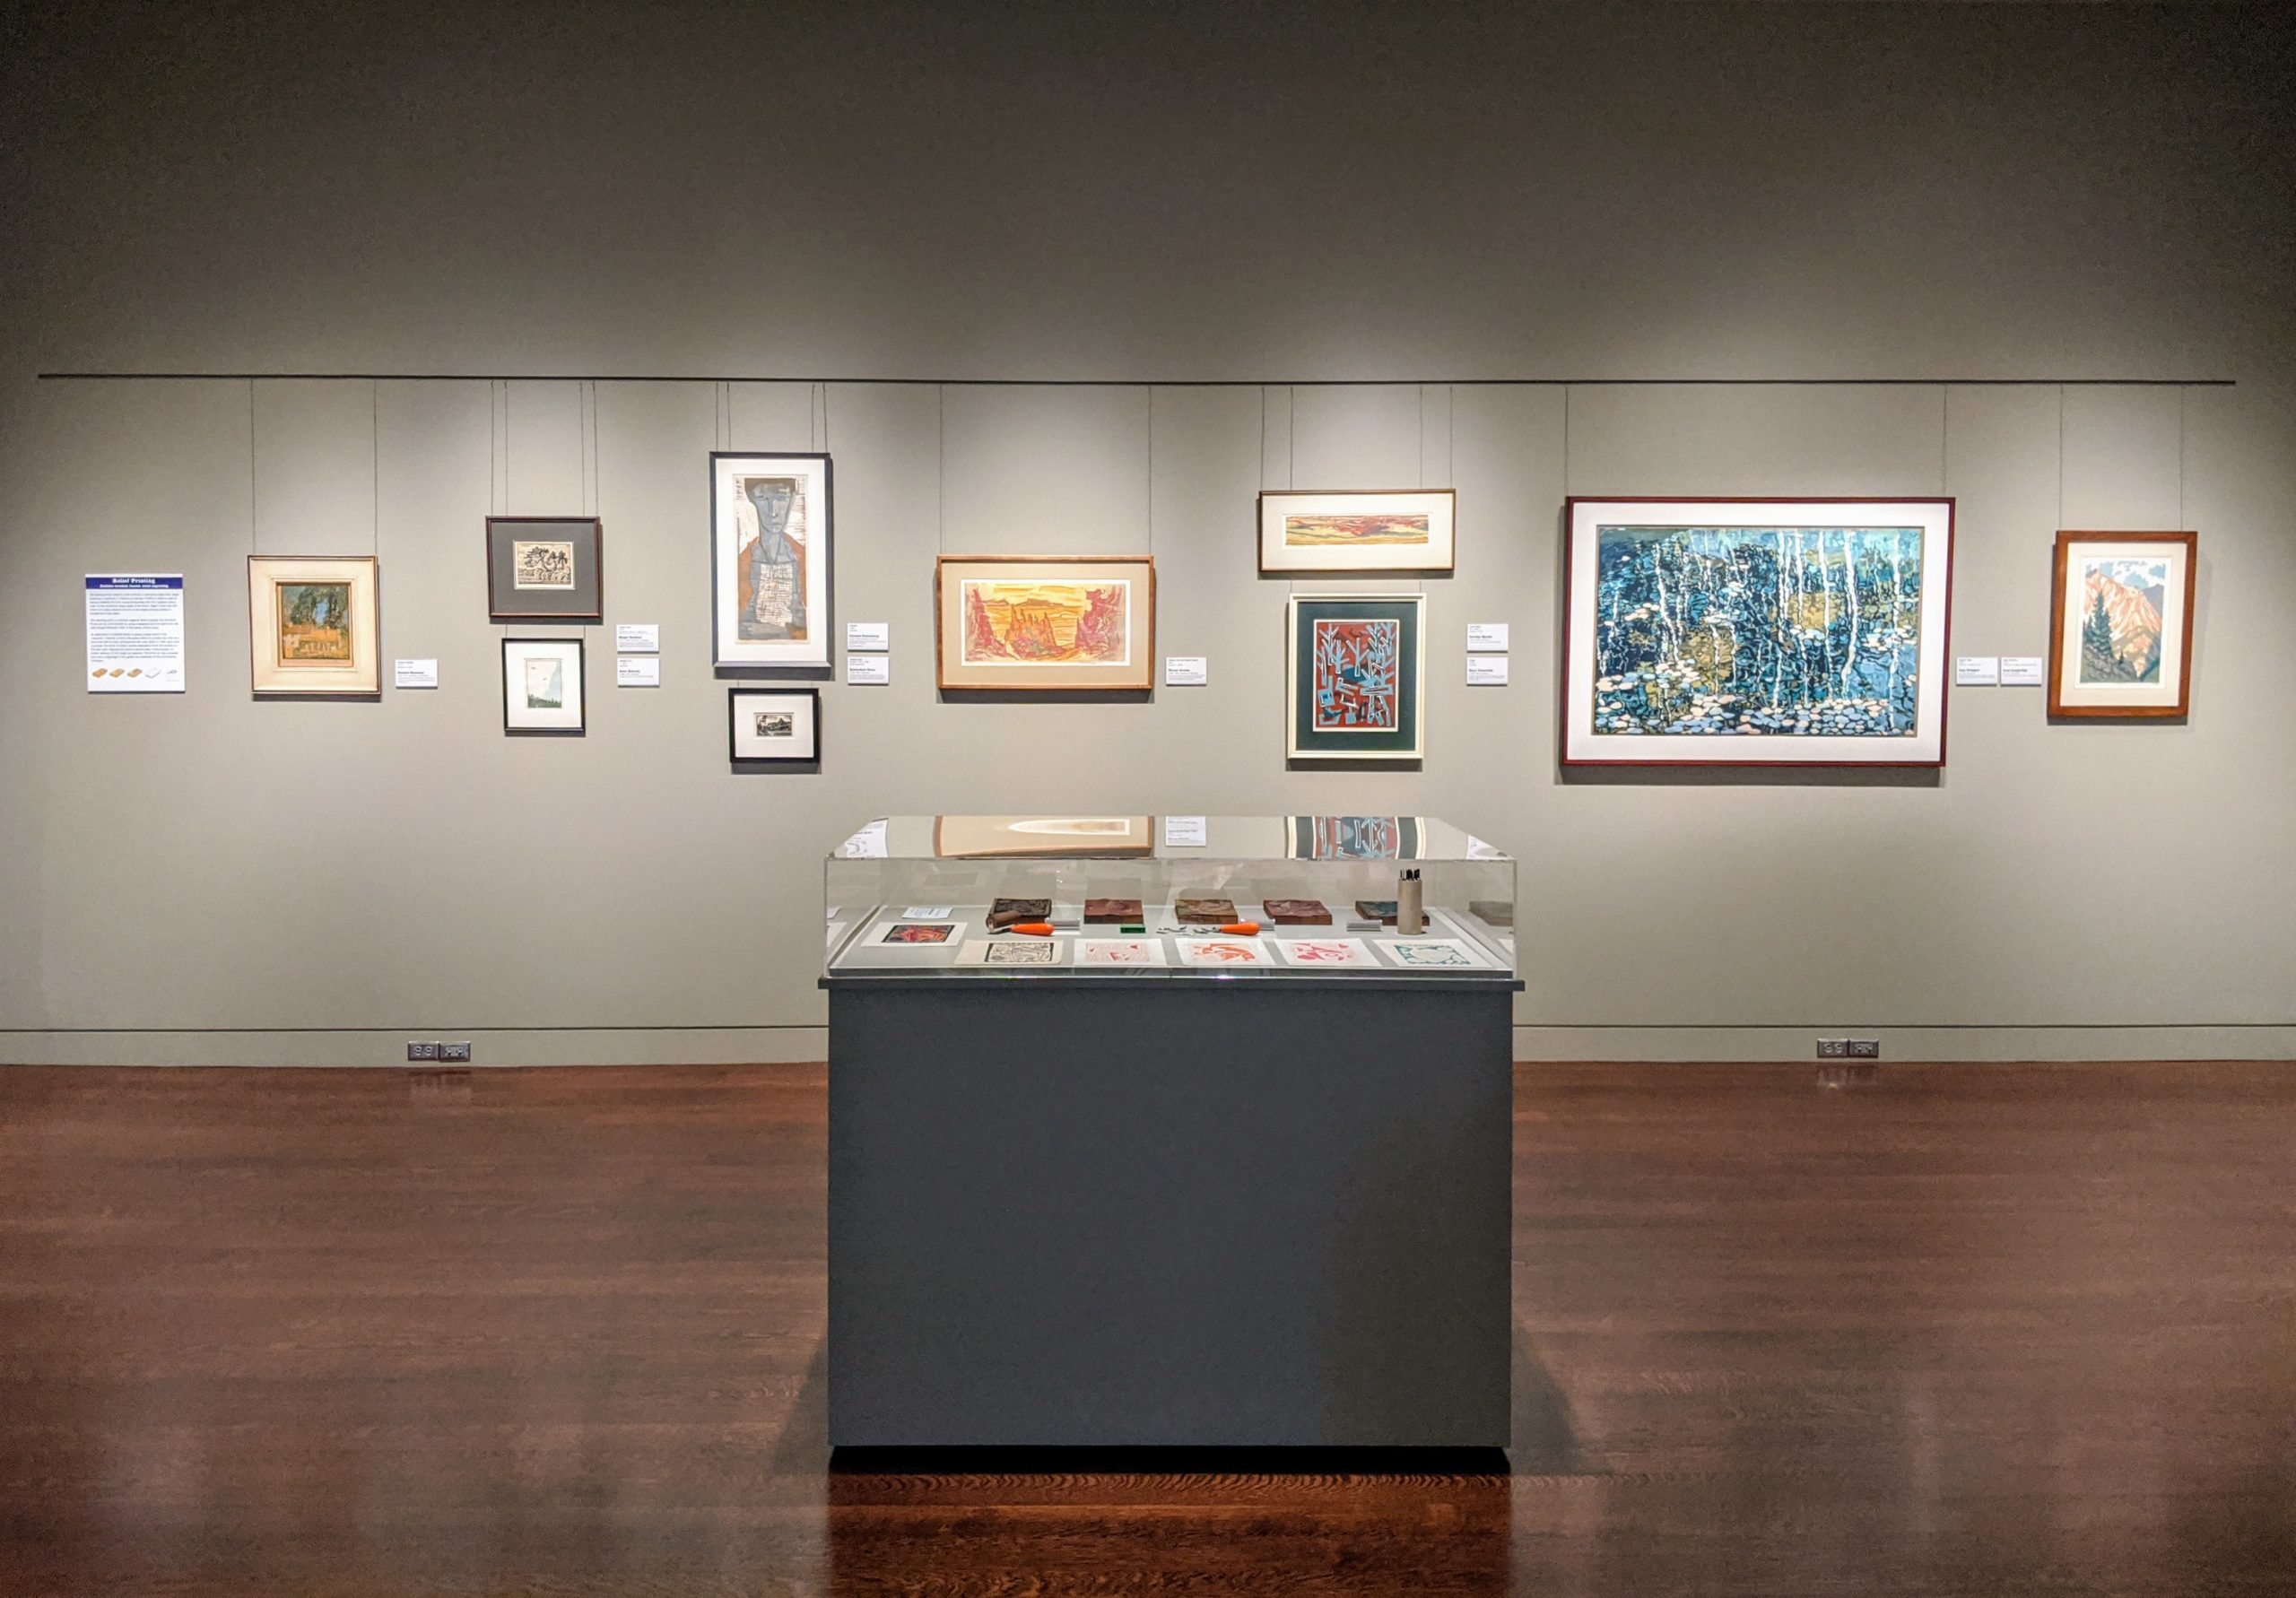
VIRTUAL EXHIBITION; In-person exhibition closed January 3, 2021


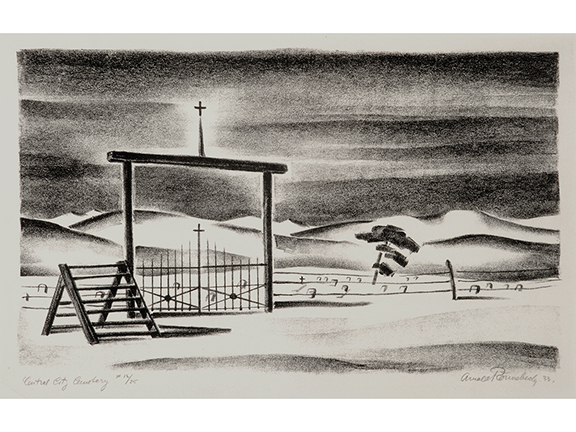
1933
lithograph, 12/25; crayon drawing study
Arnold Rönnebeck
(1885–1947, American, b. Germany)
Printed by Theodore Cuno, Philadelphia, PA. Cuno ran a business that produced prints for many nationally known artists.
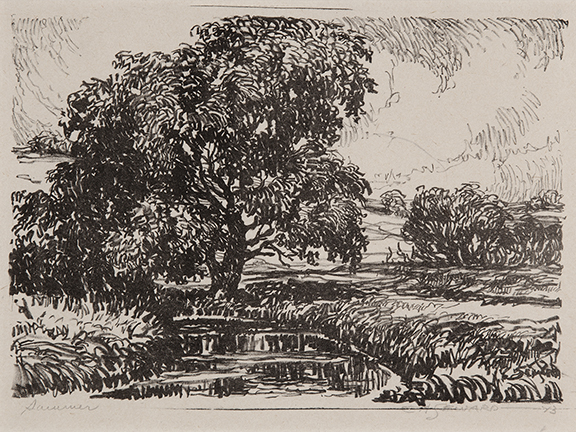
1923
lithograph
C.A. Seward
(1884–1939, American)
Printed by master printers Fred Blume or Ernest W. Bullinger at Western Lithograph Company in Wichita, KS.
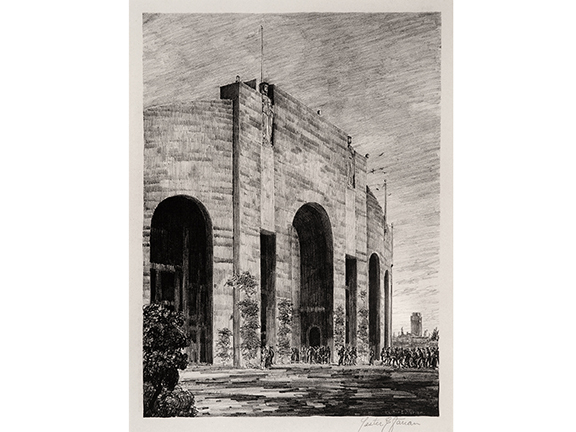
1930
lithograph, 28/40
Lester Varian
(1881–1967, American)
Printed by lithographers at the Bradford-Robinson Printing Company, founded 1881 in Denver, today known as Bradford Publishing.
1940 or earlier
lithograph
Lawrence Barrett
(1897–1973, American)
Printed by the artist at the Colorado Springs Fine Arts Center, where he was an instructor of etching and lithography from 1938 to 1952.
1940s
lithograph
Lawrence Barrett
(1897–1973, American)
Printed by the artist at the Colorado Springs Fine Arts Center, where he was an instructor of etching and lithography from 1938 to 1952.
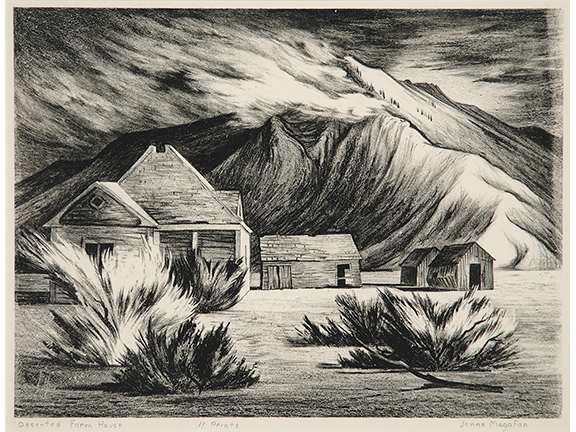
1941
lithograph, edition of 11
Jenne Magafan
(1916–1952, American)
Probably printed by Lawrence Barrett at the Colorado Springs Fine Arts Center.
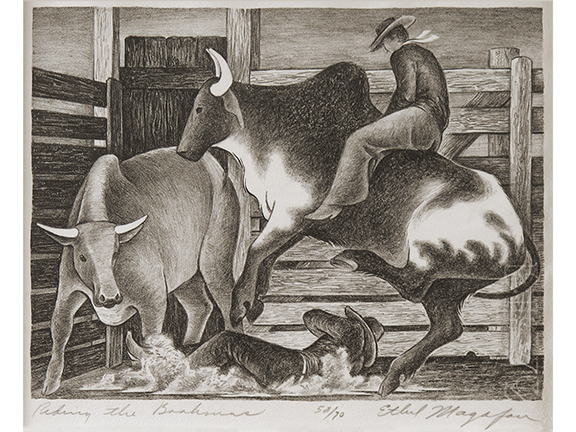
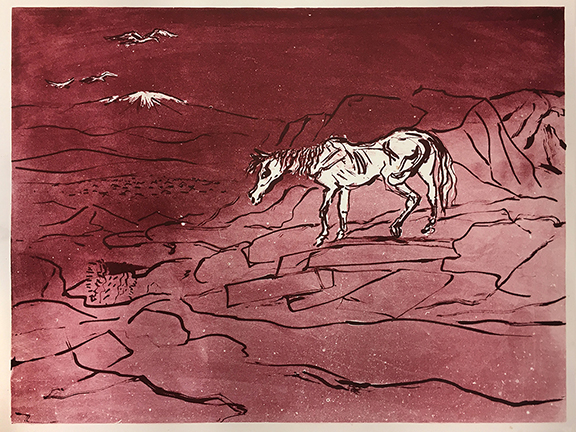
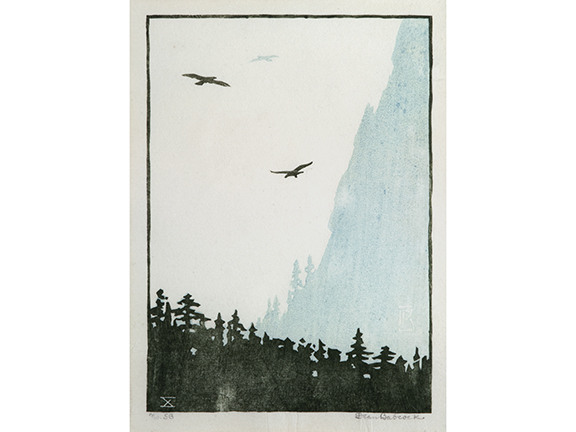
c. 1938
lithograph, 58/70
Ethel Magafan
(1916–1993, American)
Probably printed by Lawrence Barrett at the Colorado Springs Fine Arts Center.
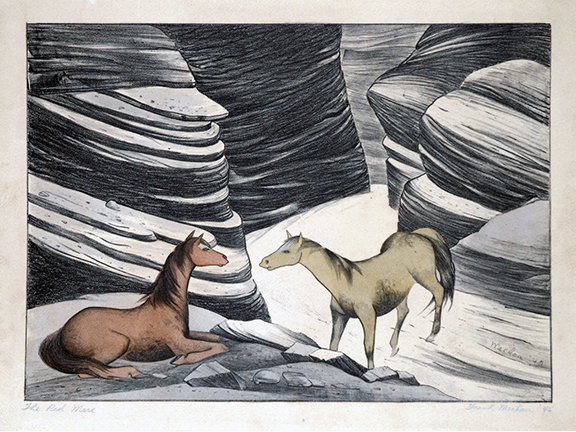
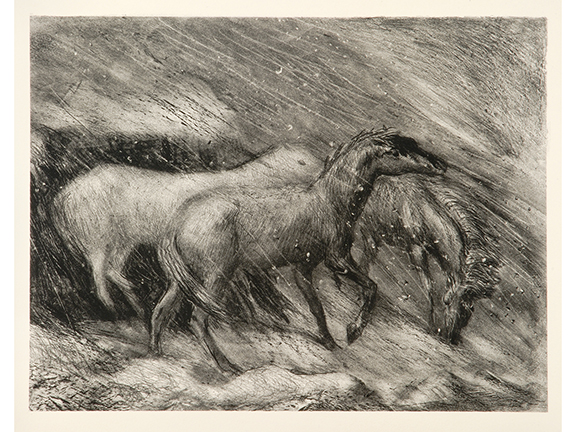
1945
lithograph, edition of about 25
Frank Mechau
(1904–1946, American)
Probably printed by Lawrence Barrett at the Colorado Springs Fine Arts Center.
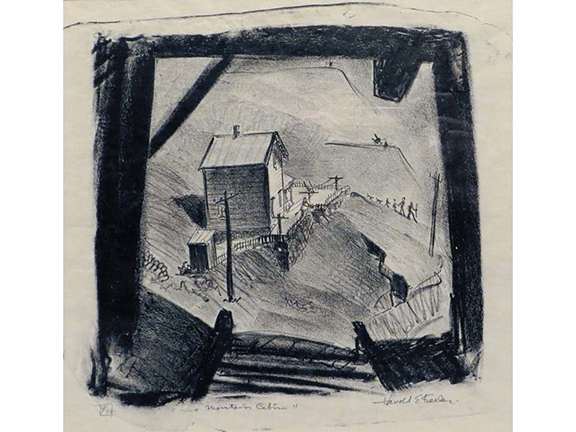
between 1932–1942
lithograph, 4/22
Harold Keeler
(1905–1968, American)
Printed by the artist, probably during his years living and working in Denver, 1932–1942.
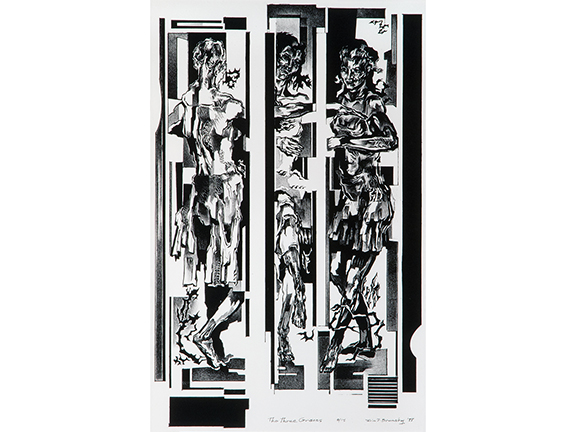
1977
lithograph, 8/14
Eric Bransby
(1916–2020, American)
Unknown printer. Bransby was teaching at the University of Missouri-Kansas City at the time (from 1965 to 1984).
1977
lithograph, 37/50
Beverly Rosen
(1924–2006, American)
Printed by the artist and Bud Shark at Shark’s Lithography Ltd., Boulder, CO (now Shark’s Ink in Lyons, CO).
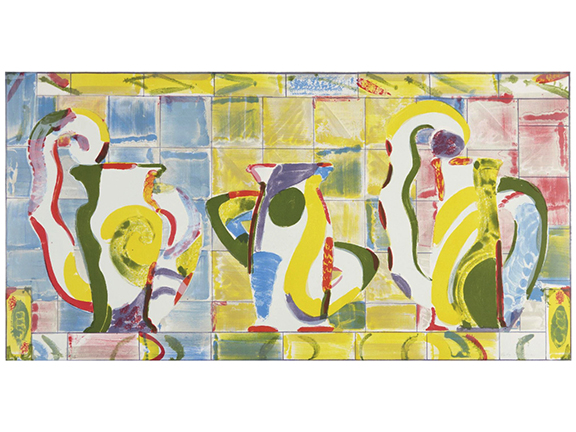
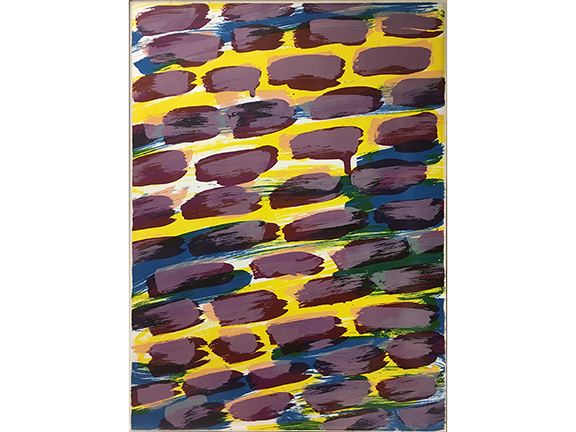
1988
lithograph, 60/65
Betty Woodman
(1930–2018, American)
Printed by SOLO Impression, Inc., Bronx, NY. Woodman lived for a time in Boulder, CO, where she taught at the University of Colorado.

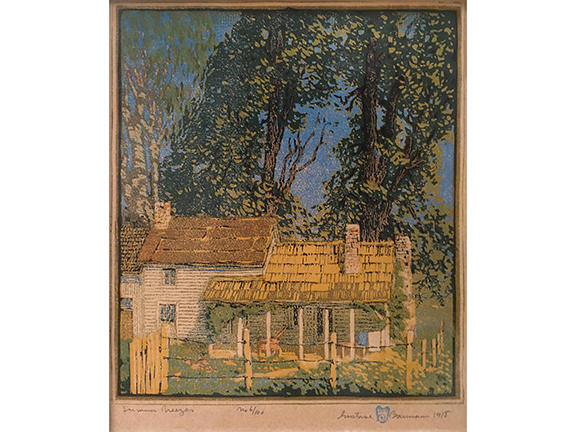
1918
woodcut, 6/100
Gustave Baumann
(1881–1971, American, b. Germany)
Printed by the artist. In 1918 Baumann moved from Indiana to Santa Fe, NM, and printed Indiana scenes in both places.
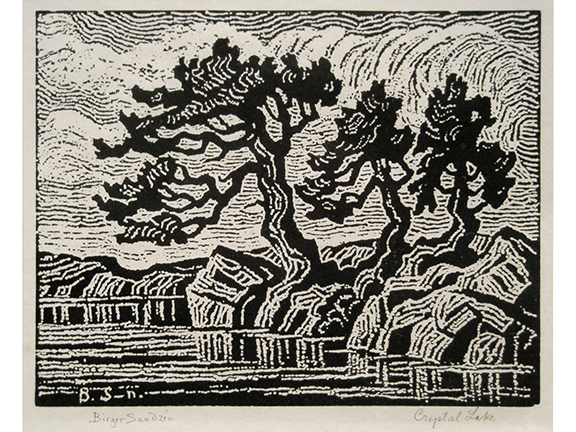
1928
woodcut (“nailcut”), 200 prints
Sandzén created the lines by repeatedly pounding a nail into the block.
Birger Sandzén
(1871–1954, American, b. Sweden)
Probably printed at the Lindsbourg News Record, Lindsbourg, KS. After his first block print in 1917,
Sandzén had others do his block printing for him.
c. 1920
woodcut
Dean Babcock
(1888–1969, American)
Printed by the artist in his Estes Park, CO studio.
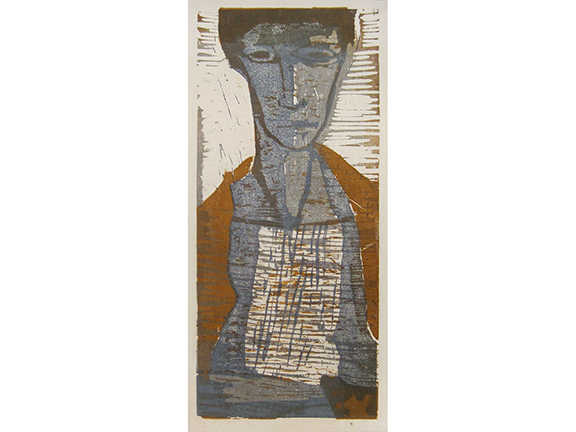
1950
woodcut
Cornelis Ruhtenberg
(1923–2008, American, b. Latvia)
Printed by the artist and Sid Stallings at the Colorado Springs Fine Arts Center.
Gift of Norm Anderson
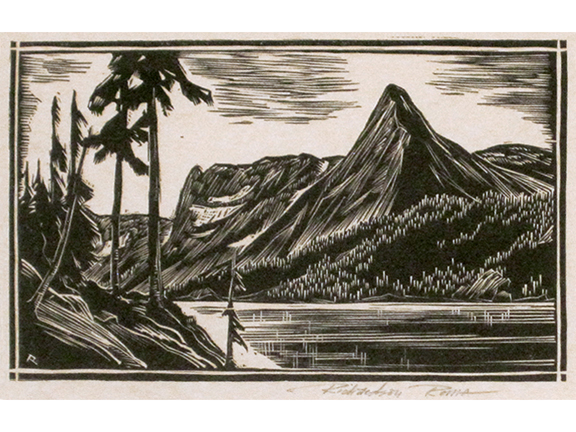
between 1931–1954
wood engraving
Richardson Rome
(1902–1981, American)
Printed by Rome Creations, the artist’s business in Estes Park, later Boulder and Denver, that produced stationery and postcards featuring original prints.
1962
woodcut, 12/30
Werner Drewes
(1899–1985, American, b. Germany)
Printed by the artist in St. Louis, MO. Drewes travelled throughout Colorado and the American Southwest while living and teaching in St. Louis.
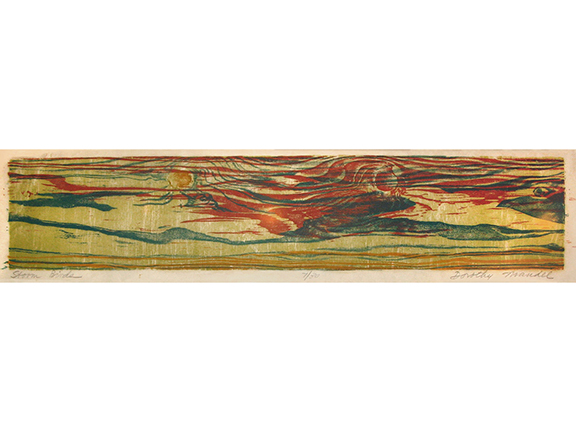
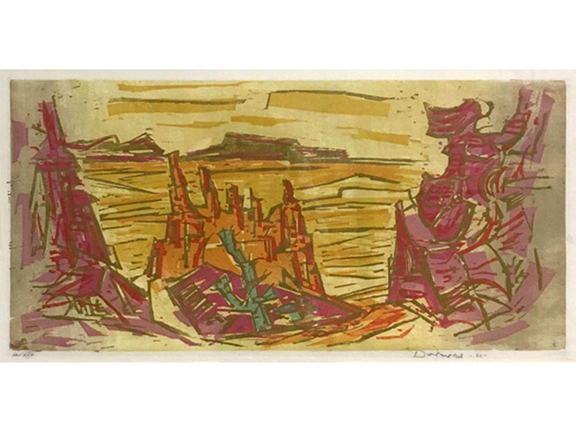
late 1960s
woodcut, 7/30
Dorothy Mandel
(1920–1995, American)
Printed by the artist in her Boulder, CO studio.
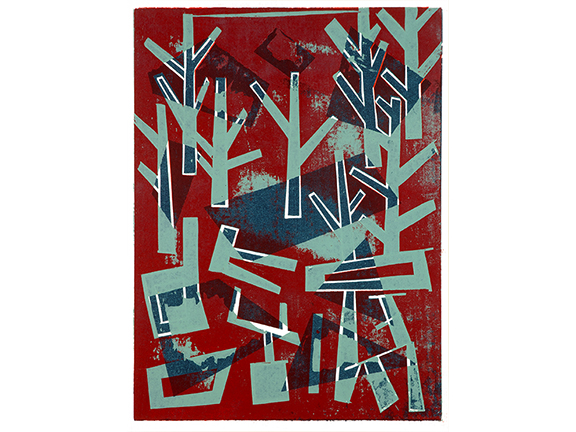
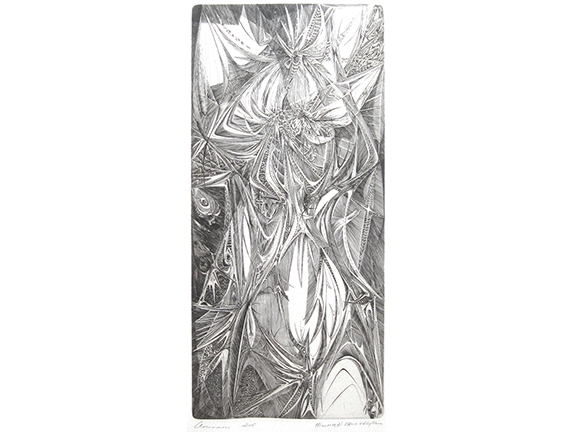
1970s
woodcut
Mary Chenoweth
(1918–1999, American)
Printed by the artist at Colorado College in Colorado Springs, where she taught art and printmaking from 1957 to 1983.
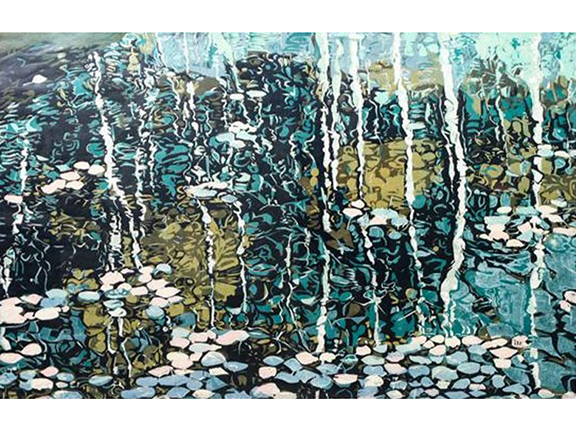
2004
reduction woodcut, 2/10
Jean Gumpper
(b. 1955, American)
Printed by the artist at Colorado College in Colorado Springs, where she is Lecturer and Artist in Residence.
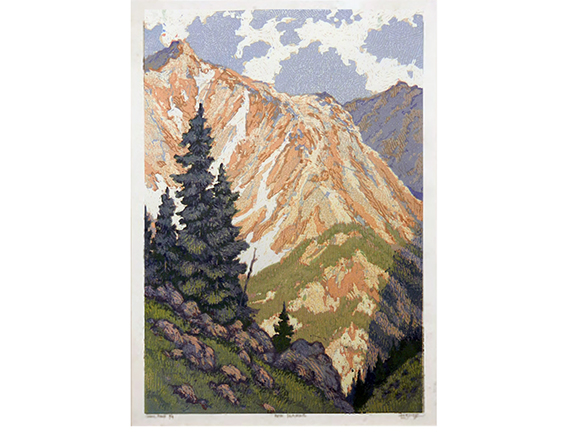
2014
reduction woodcut, Artist’s Proof 2/4
Leon Loughridge
(b. 1952, American)
Printed by the artist at Dry Creek Art Press, Denver.
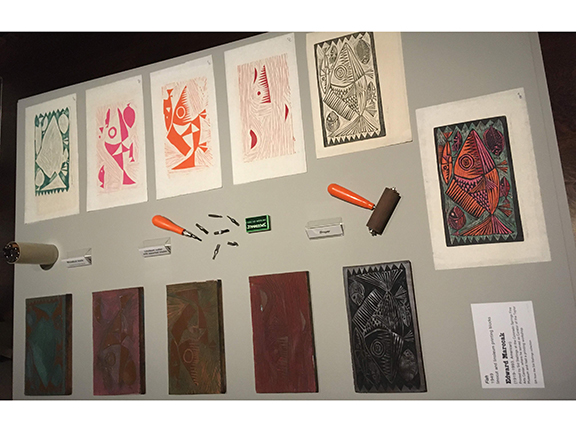
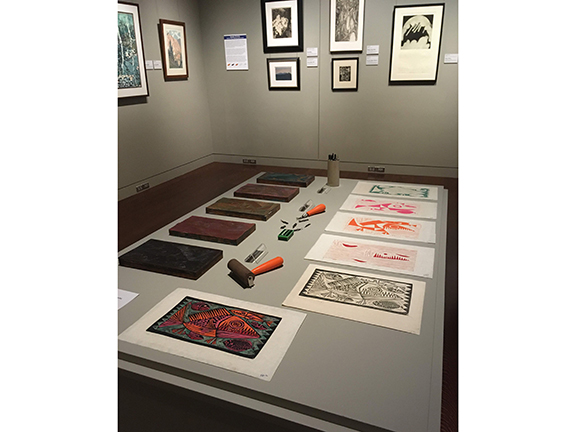
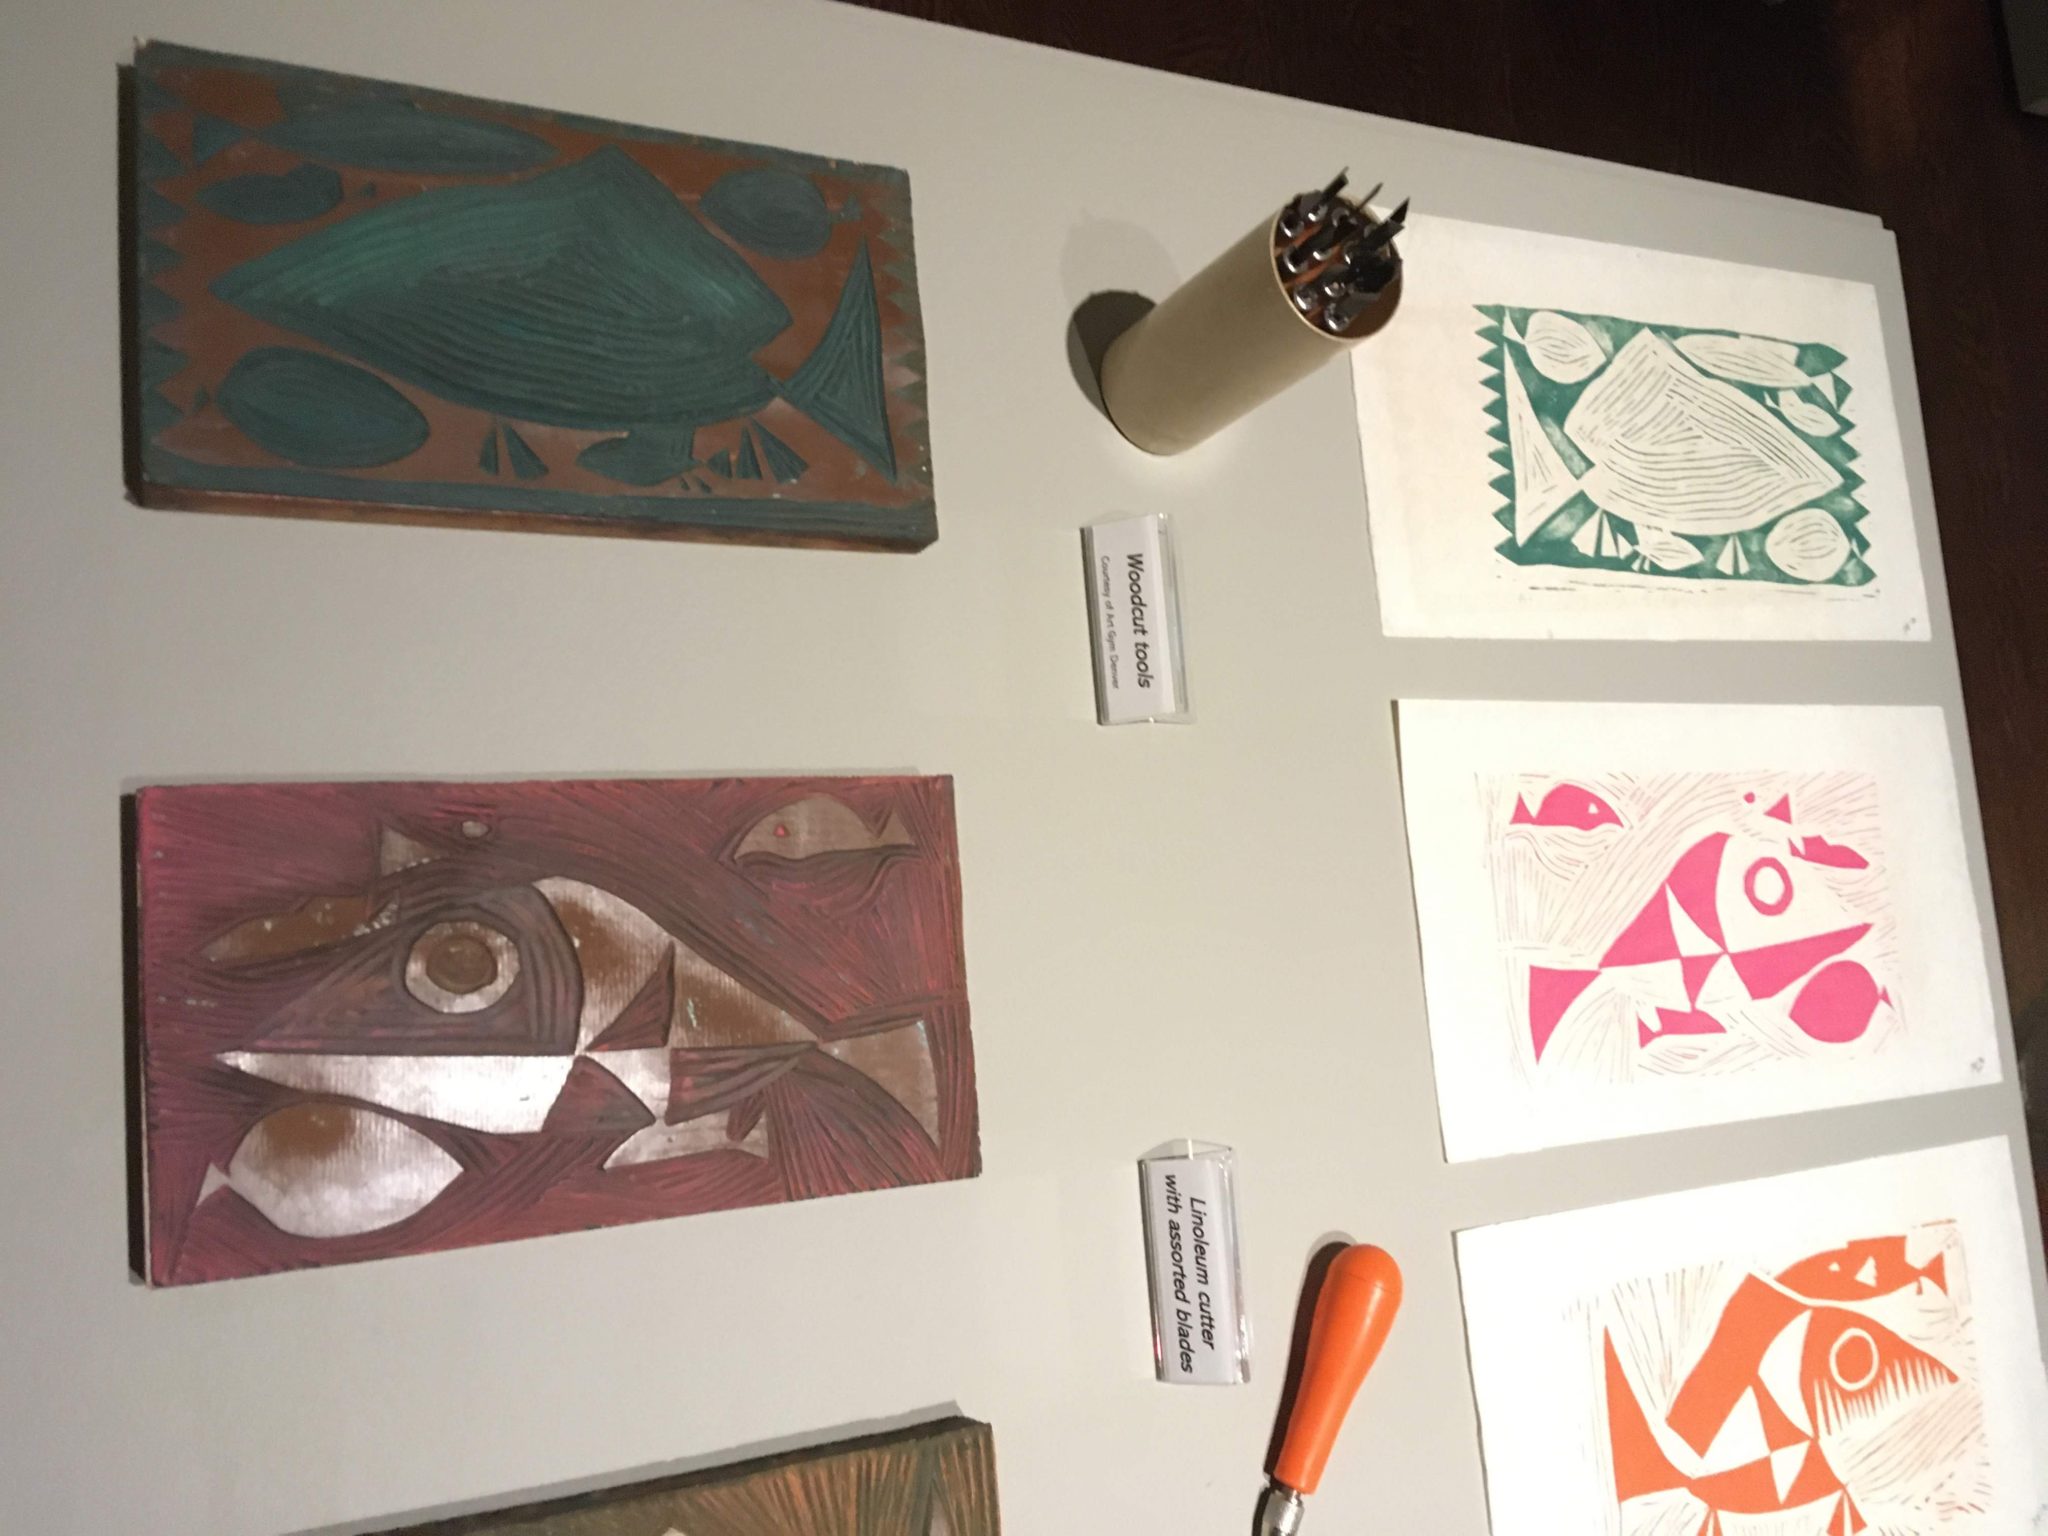
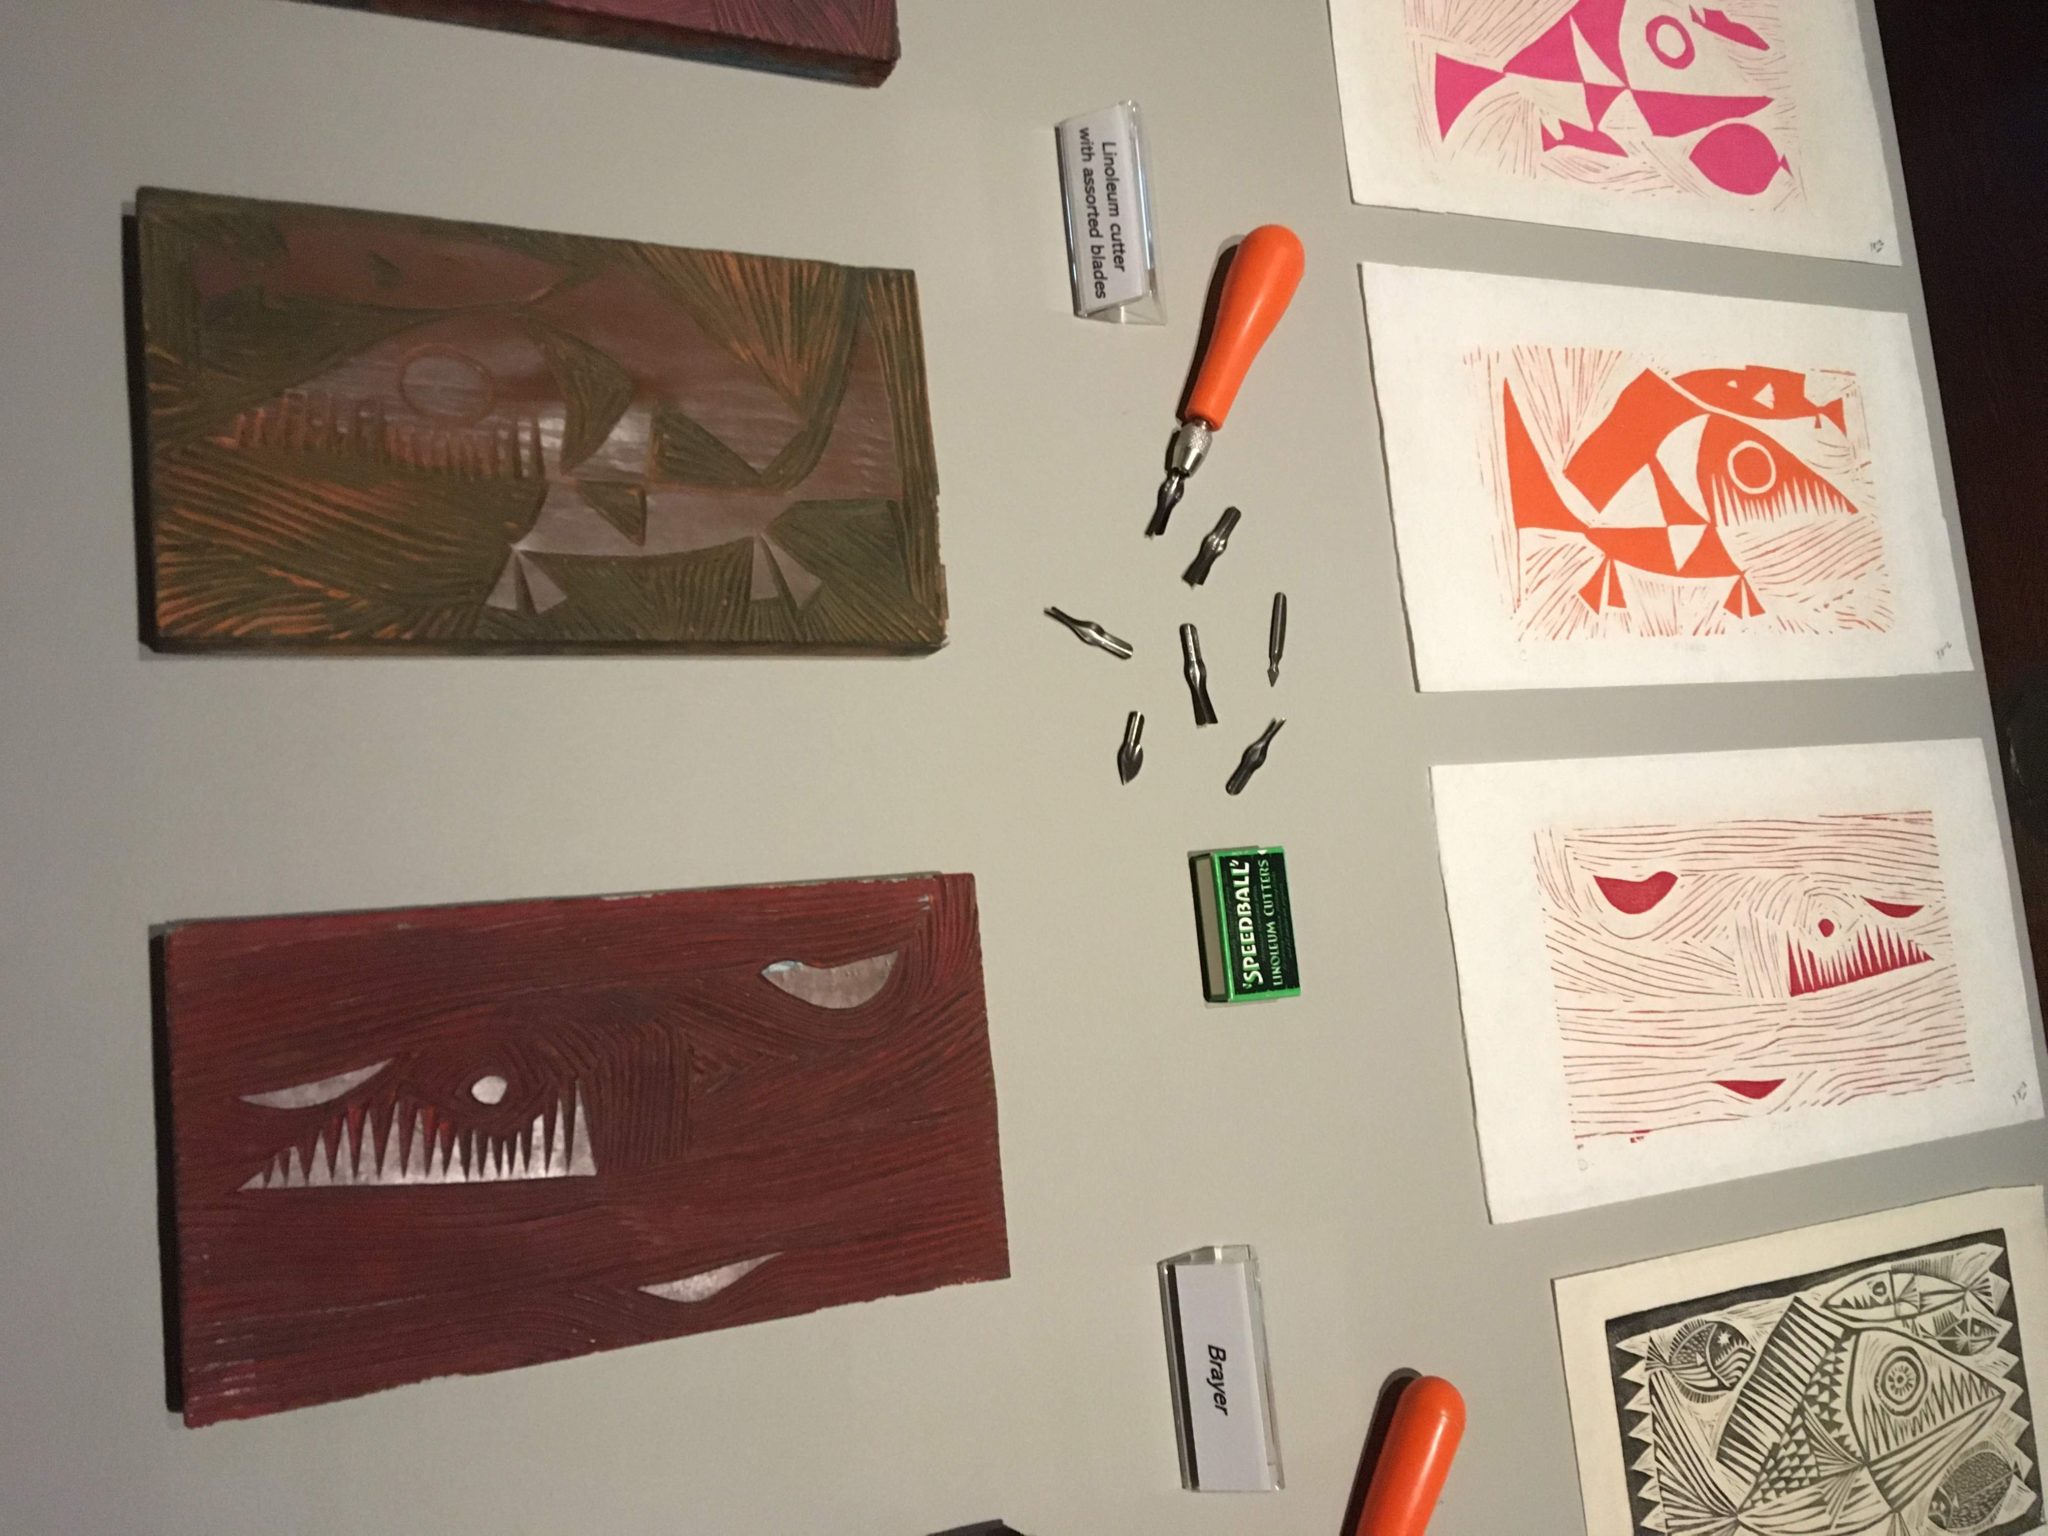
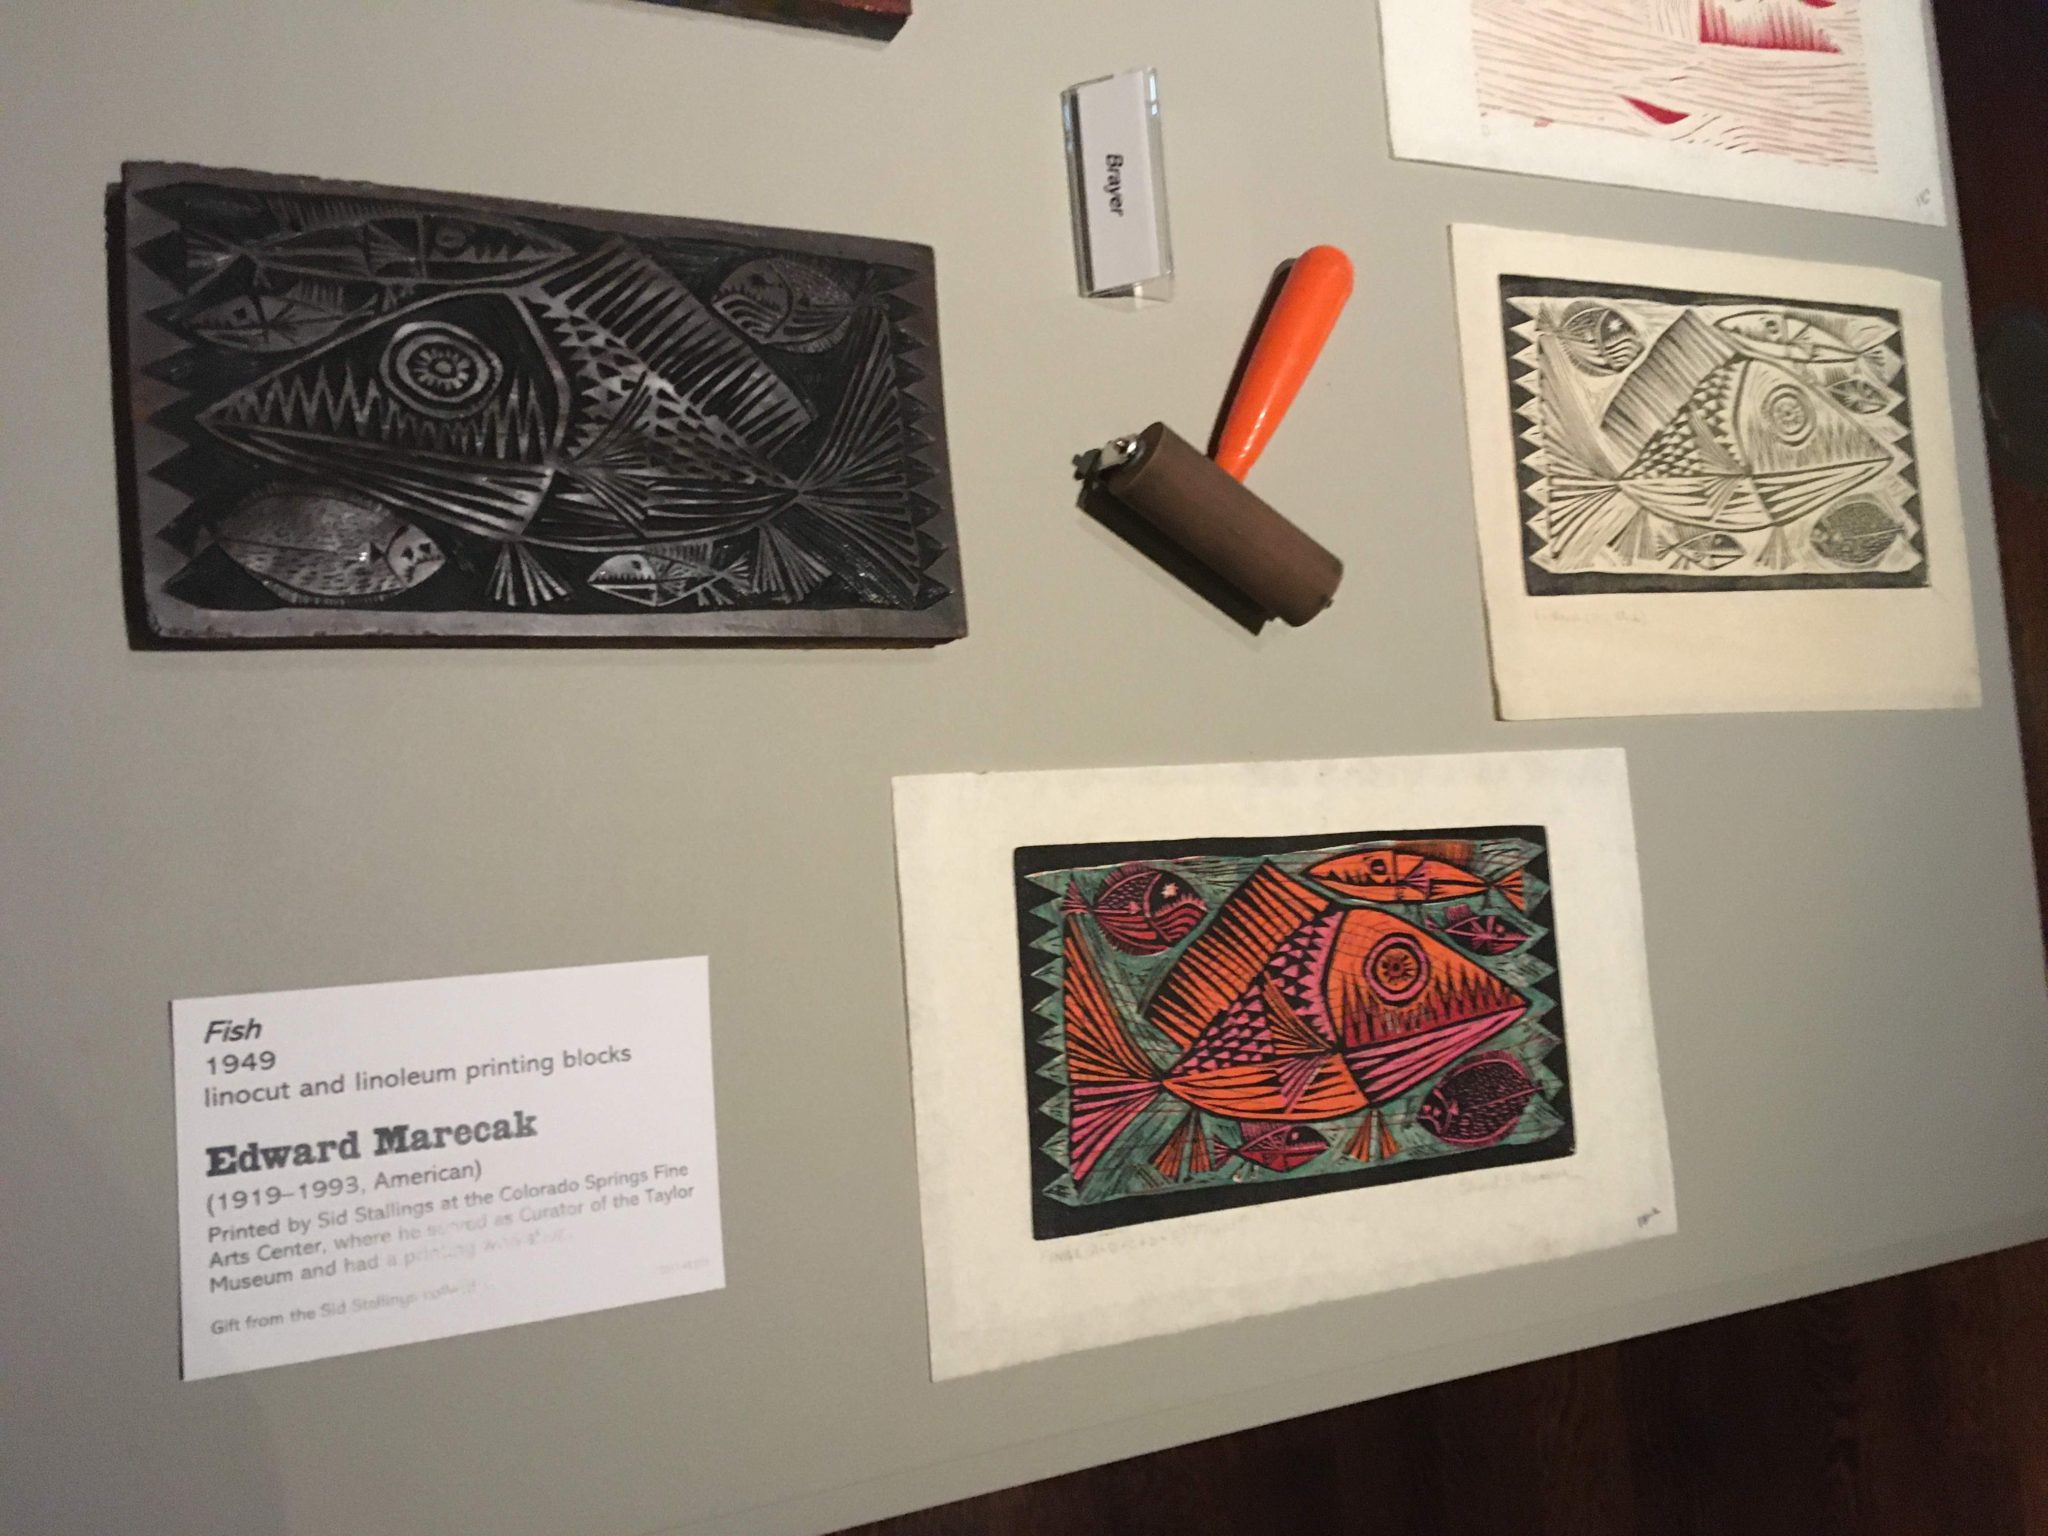
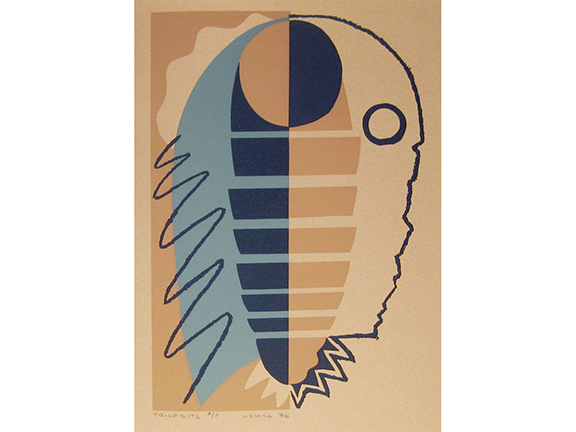
Fish
1949
linocut and linoleum printing blocks
Edward Marecak
(1919–1993, American)
Printed by Sid Stallings at the Colorado Springs Fine Arts Center, where he served as Curator of the Taylor Museum and had a printing workshop.
Gift from the Sid Stallings collection

1949
linocut
Edward Marecak
(1919–1993, American)
Printed by Sid Stallings at the Colorado Springs Fine Arts Center, where he served as Curator of the Taylor Museum and had a printing workshop.
Gift from the Sid Stallings collection


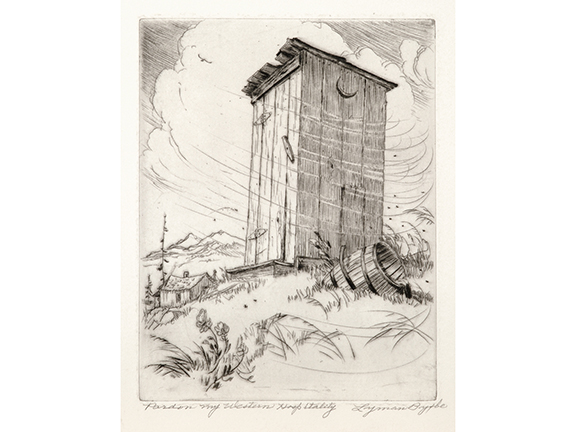
1938
etching
yman Byxbe
(1886–1980, American)
Printed by the artist in his Estes Park, CO, studio.

1941
etching, drypoint and aquatint
Gene Kloss
(1903–1996, American)
Printed by the artist. Kloss split her time between Berkeley, CA and Taos, NM at the time this print was made. She lived for about five years near Delta, CO, in the late 1960s.
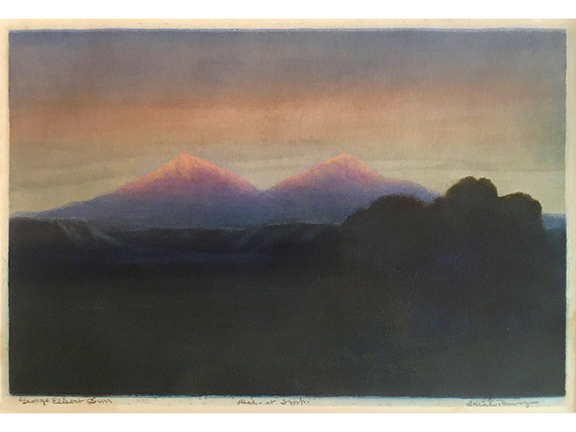
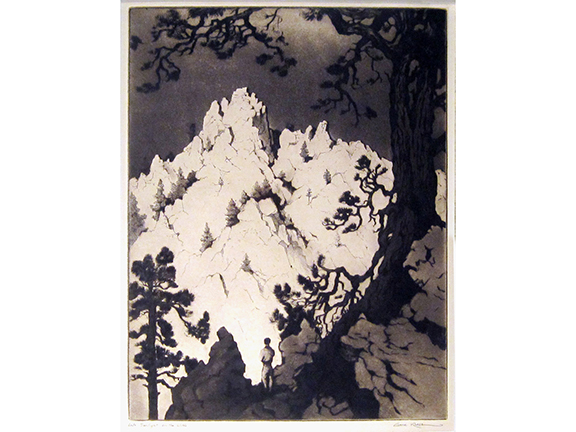
between 1906–1924
etching with aquatint, trial proof
George Elbert Burr
(1859–1939, American)
Printed by the artist in his Denver studio, where he lived and worked from 1906 to 1924.
1954
engraving, 14/25
Wendell “Bud” Black
(1919–1972, American)
Posthumous print by Black’s estate and former student Berkley Chappell at his Corvallis, OR studio. Black taught printmaking at the University of Colorado, Boulder from 1948 to 1972.
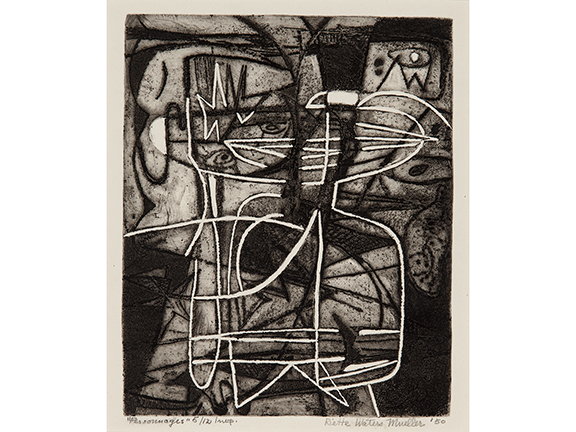
1950
etching, 5/12
Henrietta Waters Mueller
(1915–2009, American)
Unknown printer. She was living in Laramie at the time, where she was studying and teaching part time at the University of Wyoming. She moved to Boulder, CO, in the 1980s, where she lived until her death.
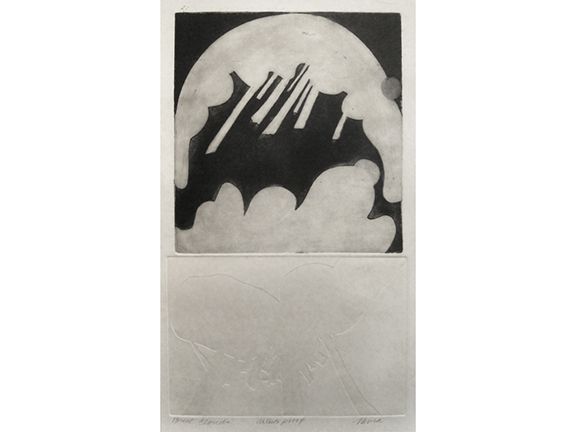
1969
etching with embossing, Artist’s Proof
Diana Vavra
(1938–2007, American)
Printed by the artist at the University of Colorado, Boulder; she received her MFA in Printmaking and Drawing there in 1970.
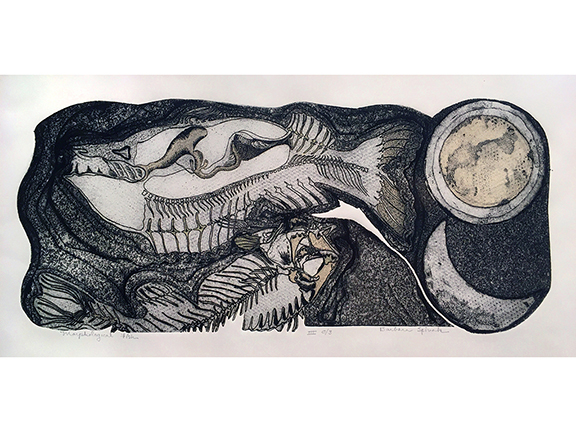
1973
hand-colored etching
Barbara Spivak
(b. 1926, American)
Printed and colored by the artist in her Denver Studio.
Gift of Barbara and Daniel Spivak

1980s
Etching with aquatint, 1/10
Martha Epp
(1907–1995, American)
Probably printed by the artist in Denver. Epp taught and was chair of the Art Department at Denver’s North High School from 1948 to 1972.
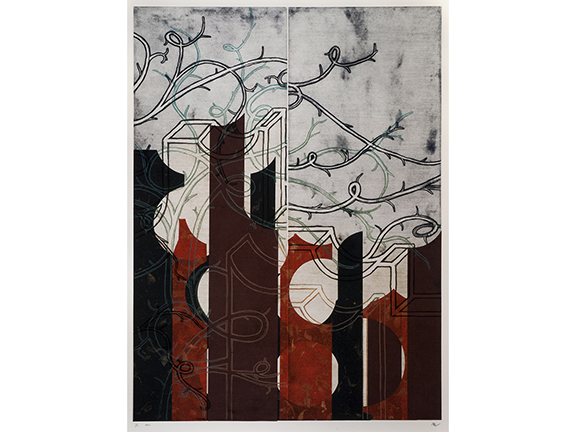
2011
zinc plate etching with chine collé
Mark Lunning
(b. 1961, American)
Printed by the artist at Open Press, Ltd., his gallery and printmaking studio in Denver, which he moved to Sterling, CO, in 2018.
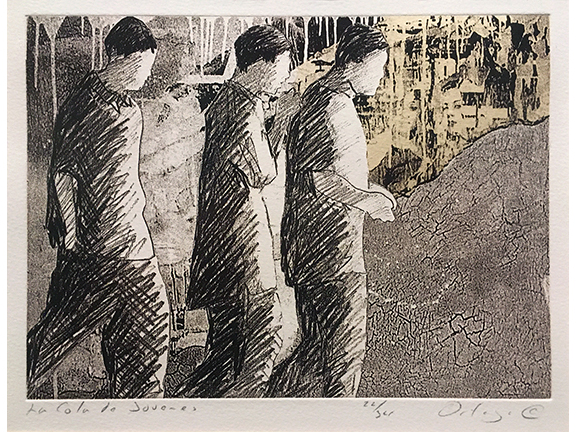
2005
polymer plate etching, 22/34
Tony Ortega
(b. 1958, American)
Printed by Mark Lunning at Open Press, Ltd., in Denver, which moved to Sterling, CO, in 2018.
Gift of Mark Lunning

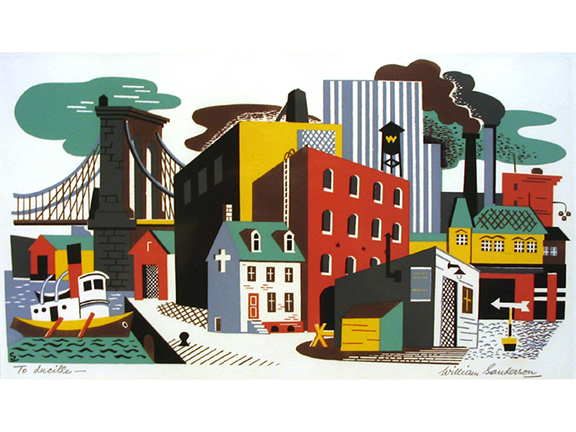
1949
serigraph
William Sanderson
(1905–1990, American, b. Latvia)
Unknown printer. Adapted from a 1946 painting by Sanderson owned by the Denver Art Museum, who offered this print as a membership gift in 1949.
Gift of Lucile Miller

1961
serigraph, 1/10
Eva “Eo” Kirchner
(1901–1991, American)
Printed by the artist in her Denver studio.
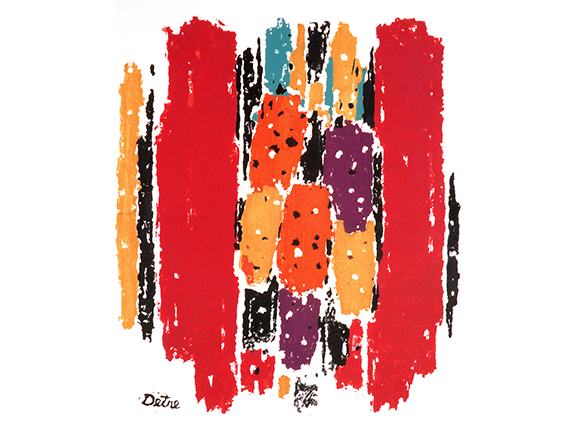
c. 1955
serigraph
Roland Detre
(1903–2001, American, b. Hungary)
Printed by the artist in his Denver studio.
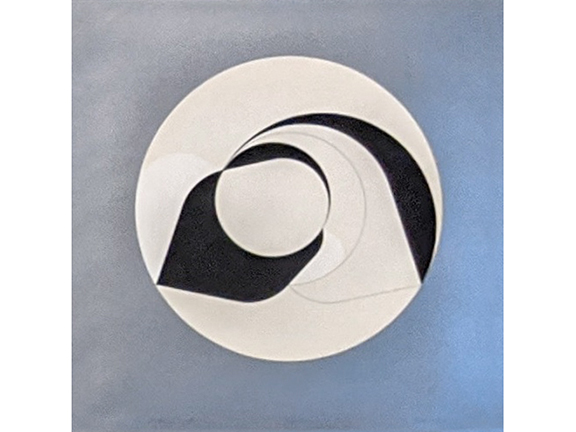
early 1960s
serigraph, 1/6
Carley Warren
(b. 1931, American)
Printed by the artist at the Emily Griffith Opportunity School, Denver, with instructor Walt Green.
Gift of the artist
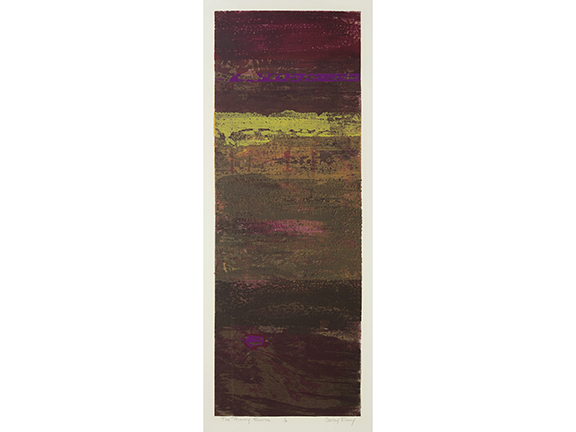
(Change in Scale #79)
1975
serigraph, 15/100
Dave Yust
(b. 1939, American)
Printed by Fred Jurado and sons at Fred Jurado Graphics, Denver.
Gift of Marlene Chambers and Family
1986
serigraph, Artist’s Proof
Reed Weimer
(b. 1957, American)
Printed by Mark Lunning at Open Press, Ltd., in Denver, which moved to Sterling, CO, in 2018.